
In today’s increasingly digital world, having a high-quality webcam is more important than ever. Whether you’re attending virtual meetings, conducting online classes, live streaming content, or simply catching up with friends and family through video calls, a clear and reliable video feed is essential. But what if your computer’s built-in webcam is subpar, broken, or nonexistent? Fortunately, you can easily transform your smartphone into a powerful and versatile webcam, often providing a significant upgrade in video quality.
This article will guide you through the process of using your smartphone as a webcam. We will explore various methods, including utilizing dedicated webcam apps and leveraging existing software solutions, to connect your Android or iPhone device to your computer. Learn how to easily set up your smartphone webcam for use with popular video conferencing platforms like Zoom, Microsoft Teams, and Google Meet, enhancing your online presence with a superior video and audio experience.
Why Use a Smartphone as a Webcam?
Using your smartphone as a webcam can offer several advantages over a traditional built-in or external webcam. Smartphones generally possess superior camera sensors, leading to a higher resolution and potentially better image quality compared to most standard webcams.
This can significantly improve your video conferencing experience, especially in situations requiring clear visuals. It’s a cost-effective solution, eliminating the need to purchase a dedicated webcam, particularly useful if you already own a smartphone.
Furthermore, smartphones offer greater flexibility. Their portability allows for easy positioning and adjustments, offering a wider range of angles and perspectives compared to fixed webcams. This is especially beneficial for presentations or demonstrations where you might need to showcase physical objects or different viewpoints.
Best Apps to Try
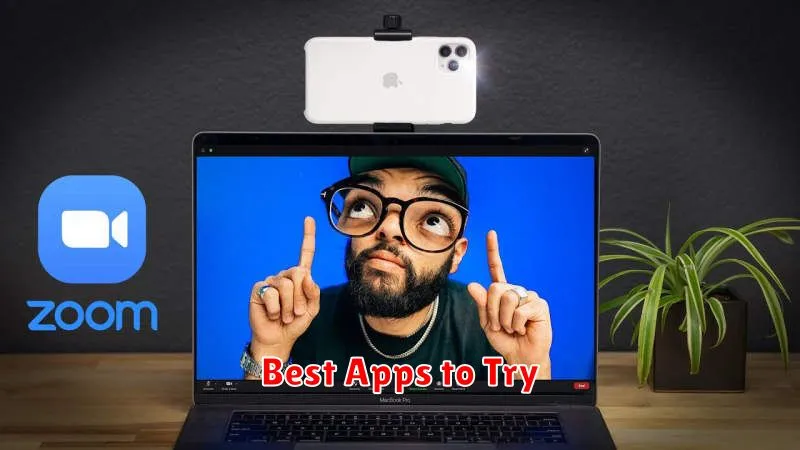
Several applications facilitate using your smartphone as a webcam. Choosing the right one depends on your operating system and specific needs. Here are a few popular and reliable options:
For Windows and macOS:
-
EpocCam: This versatile app offers both wired and wireless connections and supports high-quality video.
-
iVCam: Known for its ease of use and good performance, iVCam is a solid choice for both platforms.
For Android:
-
DroidCam: A popular choice for Android, DroidCam offers decent video quality and a simple setup process.
For iOS:
-
Reincubate Camo: Camo offers a polished user interface and advanced features, making it a premium option.
USB vs Wi-Fi Connection Setup
Choosing between a USB and Wi-Fi connection for your smartphone webcam setup involves considering several factors. USB offers a more stable and reliable connection with minimal latency. This is crucial for activities like live streaming or video conferencing where real-time interaction is essential.
Wi-Fi connections, while more convenient for their wireless capability, can be susceptible to interference and dropped signals, potentially affecting video and audio quality. Latency can also be a concern, particularly with weaker Wi-Fi signals. Consider the strength and stability of your network when opting for a wireless setup.
Camera Settings for Best Quality
Using your smartphone as a webcam hinges on optimizing its camera settings. This ensures the best possible video quality for your streaming or video conferencing needs.
Begin by selecting the highest resolution available. This will provide the clearest image. Then, manually adjust the focus if necessary. A crisp, sharp focus is paramount.
Consider the frame rate. A higher frame rate like 30 or 60fps will result in smoother motion, but may require more processing power. Adjust according to your setup. Lastly, ensure adequate lighting. Good lighting drastically improves video quality. Position yourself facing a light source or utilize a desk lamp.
Mounting and Positioning Tips
Proper mounting and positioning are crucial for a professional-looking webcam setup. Consider using a dedicated smartphone tripod or a flexible mount for optimal stability. Avoid shaky footage by ensuring your chosen mount is secure.
Positioning your phone at eye-level is generally recommended for video calls and conferences. Experiment with different angles to find what works best for your setup and lighting. Ensure the camera lens is clean for a clear image.
Key Considerations:
- Stability: A stable mount prevents distracting camera shake.
- Eye-Level Positioning: Creates a more natural and engaging look for viewers.
- Clean Lens: Ensures a crisp and clear image.
Microphone and Audio Setup
Selecting the correct microphone is crucial for clear audio. Your smartphone likely has a built-in microphone, which is often sufficient. However, for improved audio quality, consider using an external microphone.
Connecting an external microphone can usually be done via the headphone jack or a USB adapter. Ensure your smartphone recognizes the external microphone as the primary audio input.
Testing your audio is essential before any recording or streaming. Use a sound recorder app on your phone to monitor audio levels and quality. Adjust input volume as needed to prevent distortion or excessively quiet audio.
Use Cases: Meetings, Streaming, More
Transform your smartphone into a versatile webcam for various applications. A primary use case is video conferencing and online meetings. Improve the quality of your virtual presence with your phone’s superior camera.
Beyond meetings, consider using your phone for live streaming on platforms. Elevate your content creation with improved video quality. Additionally, your smartphone webcam can be utilized for recording videos, offering a portable and high-quality recording solution.